How To Replace A Sink Stopper: A Simple DIY Guide
- Diane Serra Huelma
- Dec 12, 2025
- 5 min read

Replacing a sink stopper might seem stressful at first, but it's a surprisingly manageable DIY task for any homeowner. Whether your sink stopper is stuck, broken, or simply worn out from years of use, this guide will walk you through every step. Also, you’ll learn which tools you need, how to identify the type of stopper you have, and how to troubleshoot common issues that arise during the process. With a bit of patience and the right approach, you can restore your sink's full functionality, and maybe even pick up a few handy skills in the process. Let’s jump into the details.
Understanding The Sink Stopper Mechanism
To effectively replace a sink stopper, it helps to understand how it works. A sink stopper, commonly found in kitchen and bathroom sinks, serves a simple purpose: it holds water in the basin when needed and allows for drainage when lifted. Most sink stoppers function using a lift-pull lever or a pop-up mechanism installed on the sink.
In a typical lift-pull setup, you will find:
Lift Rod: This is connected to the stopper and is responsible for raising and lowering it.
Stopper: The object that blocks the drain.
Linkage: A connection between the lift rod and the stopper, allowing them to work in tandem.
Understanding these components will make it easier for you to identify issues and execute the necessary repairs.
Common Reasons For Replacement
There are several reasons why you might need to replace your sink stopper:
Damage or Wear: Over time, sink stoppers can wear out, become cracked, or even disintegrate, resulting in leaks or ineffective sealing.
Rust or Corrosion: If you have a metal sink stopper, it could corrode under prolonged contact with water, leading to malfunction.
Mechanical Failure: The mechanism connecting the lift rod to the stopper might break or become misaligned, causing operational issues.
Clogging: Sometimes, debris or mineral buildup can render the stopper ineffective, leading to constant drainage issues.
Identifying any of these problems could prompt a necessary replacement, ensuring your sink functions properly.
Tools And Materials Needed
Before you start, gather the necessary tools and materials:
New sink stopper: Ensure it matches the size and type of your current stopper.
Wrench or pliers: For loosening and tightening connections.
Screwdriver: To unscrew any components.
Bucket or container: To catch any water that may spill when you disassemble the stopper mechanism.
Rag or towel: For cleanup and to dry any water spillage.
Having these tools on hand will make the replacement process smoother and more efficient.
Step-By-Step Guide To Replacing The Sink Stopper
Follow these steps to replace your sink stopper:
1. Gather Your Materials
Have all your tools and new stopper ready to go.
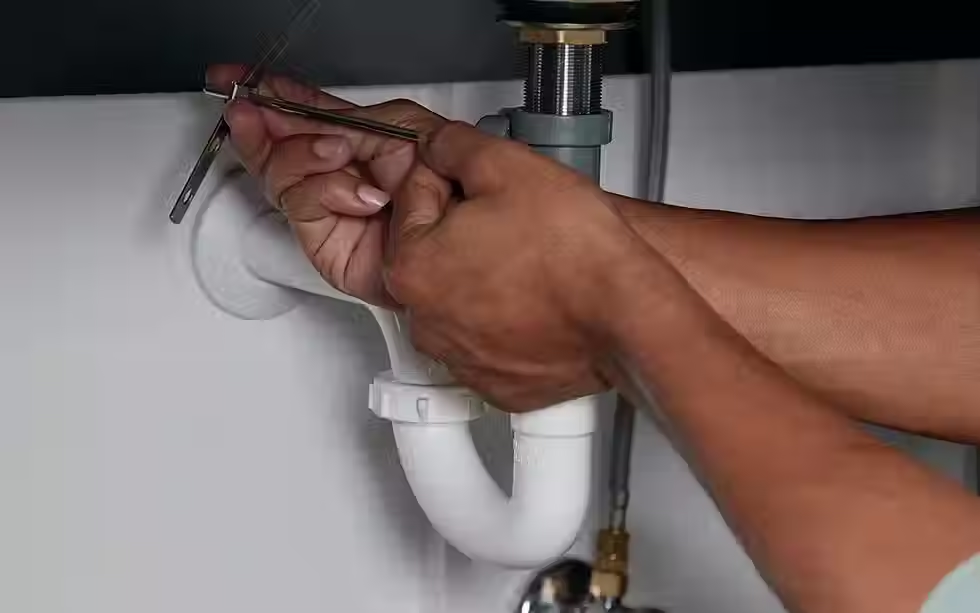
2. Remove the Old Stopper
Disassemble the Lift Rod: Locate the lift rod at the back of the sink, then loosen the set screw with a screwdriver and pull the rod out.
Remove the Stopper: Depending on the type, you might need to unscrew the stopper or pull it straight out. If it's stuck, wiggle it gently while pulling.
3. Clean Any Debris
Before installing the new stopper, clean the area around the drain to remove any buildup or debris.
4. Install the New Stopper
Insert the new stopper into the drain. If it requires a screw, align it correctly and tighten it securely.
Reconnect the Lift Rod: Thread the lift rod back through the hole and secure it with the set screw.
5. Test the Mechanism
With the new stopper in place, operate the lift rod a few times to ensure the stopper opens and closes smoothly without any issues.
6. Double Check for Leaks
Run water into the sink to check for any leaks around the stopper. If you notice any, ensure everything is tightened properly.
Trusted Local Experts for Sink Repairs and More
If you'd prefer to skip the hassle, The Handyman San Diego is a trusted local option for professional sink-stopper replacement and a full range of home improvement services. Our experienced team can tackle everything from flooring installation and drywall repairs to electrical upgrades, fixture replacements, and general home maintenance.
Whether you're dealing with a small repair or a larger project, they pride themselves on delivering reliable, high-quality workmanship with friendly, dependable service.
Maintaining Your New Sink Stopper
To prolong the life of your new sink stopper, consider these maintenance tips:
Regular Cleaning: Clean around the stopper regularly to prevent the buildup of debris.
Check for Wear: Periodically inspect the stopper and linkage components for signs of wear or rust.
Use Mild Cleaning Solutions: Avoid harsh chemicals that could corrode your sink stopper. Stick to natural cleaners when possible.
Address Issues Promptly: If you notice leaks or difficulty operating the stopper, address these issues right away to prevent further damage.
By keeping a close eye on your sink stopper and maintaining it well, you can enhance its functionality and lifespan.
Conclusion
Replacing a sink stopper is a straightforward DIY project that any homeowner can tackle. By understanding how your sink stopper works, recognizing common issues, and following a step-by-step replacement guide, you can address most problems with confidence. Taking a few minutes to maintain your new stopper will also help prevent future clogs and ensure everything continues operating smoothly. With a little effort and attention to detail, you’ll keep your sink functioning reliably and enjoy the satisfaction that comes with handling your own home improvements.
If you’d rather leave the job to a professional—or need assistance with additional home repairs—The Handyman San Diego is here to help.
Contact us to schedule your sink-stopper replacement or ask about our flooring, drywall, electrical, and other handyman services. Let us handle the hard work so you can get back to enjoying your home.
Frequently Asked Questions
What are the common reasons for replacing a sink stopper?
Common reasons include damage or wear, rust or corrosion, mechanical failure of the lift rod connection, and clogging from debris buildup.
How do I remove the old sink stopper?
To remove the old sink stopper, disassemble the lift rod by loosening the set screw, then pull out the rod and remove the stopper by unscrewing or gently wiggling it out.
What tools do I need to replace a sink stopper?
You will need a new sink stopper, wrench or pliers, a screwdriver, a bucket to catch water, and a rag for cleanup to efficiently replace the stopper.
Can I replace a sink stopper without professional help?
Yes, replacing a sink stopper is a manageable DIY task that most homeowners can do themselves using a detailed guide and the right tools.
What should I do if my new sink stopper is leaking?
If your new sink stopper is leaking, check to ensure that all connections are tightened properly and inspect for debris that may prevent a proper seal.


Comments