
How to Install a Water Filtration System at Home A Step by Step Guide

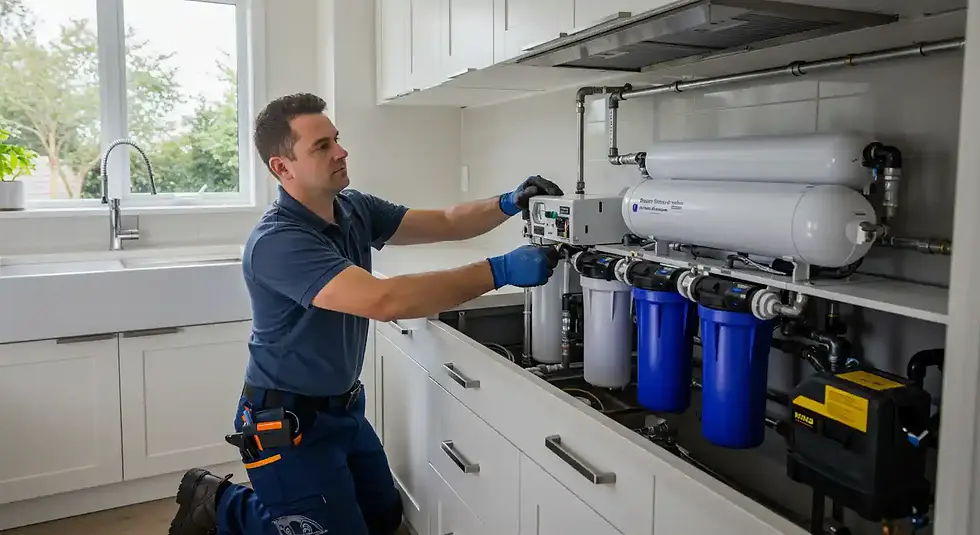
Clean, fresh-tasting water is essential for health and daily life. Installing a home water filtration system can improve water quality by removing contaminants, odors, and unpleasant tastes. This guide walks you through the types of water filtration systems, the tools and materials needed, detailed installation steps, common challenges, and the benefits of filtered water.
This helps you select the most suitable system and ensures you have the correct fittings, connectors, and replacement filters on hand. With proper preparation and a step-by-step approach, installing a water filtration system can be a manageable DIY project that delivers long-term health benefits and convenience for your home.
Let’s start!
Types of Water Filtration Systems Available
Choosing the right water filtration system depends on your water source, budget, and specific needs. Here are the most common types:
Activated Carbon Filters
These filters use activated carbon to remove chlorine, sediment, volatile organic compounds (VOCs), and improve taste and odor. They are affordable and widely used in pitchers, faucet attachments, and under-sink systems.
Reverse Osmosis (RO) Systems
RO systems push water through a semipermeable membrane to remove dissolved solids, heavy metals, fluoride, and many contaminants. They provide very pure water but require more space and maintenance. They are ideal for households seeking high-quality drinking water, especially in areas with hard or heavily contaminated water supplies.
Ultraviolet (UV) Purifiers
UV systems use ultraviolet light to kill bacteria, viruses, and other microorganisms. They are often combined with other filtration methods for comprehensive protection. Because they do not remove sediment or chemicals, pre-filtration is usually necessary for optimal results.
Ceramic Filters
These filters use porous ceramic material to trap bacteria and sediment. They are durable and reusable, but may not remove chemical contaminants. Regular cleaning of the ceramic surface helps maintain its effectiveness and prolong its lifespan.
Whole House Filtration Systems
Installed at the main water line, these systems filter all water entering the home. They often combine multiple filtration methods to address sediment, chlorine, and other contaminants.
Understanding these options helps you select a system that aligns with your water quality needs and installation preferences.
Essential Tools and Materials Needed for Installation
Before starting the installation, gather the following tools and materials to ensure a smooth process:
Adjustable wrench
Drill with appropriate bits
Screwdriver (Phillips and flathead)
Pipe cutter or hacksaw (for cutting pipes)
Teflon tape (plumber’s tape)
Bucket or towel (to catch water spills)
Water filtration system kit (including filters, tubing, fittings)
Mounting brackets and screws (usually included)
Safety glasses and gloves
Having these ready will save time and prevent interruptions during installation.
Step-by-Step Installation Guide
This guide covers installing a common under-sink water filtration system, which is popular for home use.
1. Turn Off the Water Supply
Locate the cold water shutoff valve under the sink and turn it off. Open the faucet to drain any remaining water and relieve pressure. This step helps prevent accidental leaks or water spray during installation.
2. Prepare the Installation Area
Clear out the cabinet under the sink to create space. Place a bucket or towel to catch any drips during installation. Ensuring a clean and organized workspace makes the process smoother and safer.
3. Install the Feed Water Adapter
Disconnect the cold water supply line from the shutoff valve. Attach the feed water adapter (included in the kit) to the valve, then reconnect the supply line to the adapter. Use Teflon tape on threaded connections to prevent leaks. Tighten all connections securely, but avoid over-tightening to prevent damage.
4. Mount the Filter System
Choose a convenient spot on the cabinet wall to mount the filter system. Use the mounting brackets and screws to secure the filter housing. Ensure it is accessible for future filter changes. Ensure it is accessible for future filter changes. Leave sufficient clearance below the unit to remove and replace filter cartridges as needed easily.
5. Connect the Tubing
Cut the tubing to length using a pipe cutter or sharp scissors. Connect one end of the tubing to the feed water adapter and the other to the filter system’s inlet port. Attach another piece of tubing from the filter outlet to the dedicated faucet or existing faucet adapter.
Push tubing firmly into quick-connect fittings until secure. Check the manufacturer’s instructions for specific connection details.
6. Install the Dedicated Faucet (If Included)
If your system includes a separate faucet, drill a hole in the sink or countertop if one does not already exist. Insert the faucet base and secure it with the provided hardware. Connect the tubing from the filter outlet to the faucet. Ensure the faucet is positioned securely and tightened properly to prevent wobbling or leaks.
7. Turn On the Water and Check for Leaks
Slowly open the shutoff valve and check all connections for leaks. Tighten fittings if necessary. Let water run through the system for several minutes to flush out any carbon dust or impurities. This initial flushing also helps activate the filters and ensures clean water flow.
8. Replace Filters as Recommended
Follow the manufacturer’s recommended filter replacement schedule, typically every 6 to 12 months, to maintain water quality. Keeping a regular maintenance routine ensures the system continues to perform efficiently and safely.
Common Challenges and Troubleshooting Tips
Installing a water filtration system can present challenges. Here are common issues and how to address them:
Leaking Connections
Ensure all fittings have Teflon tape and are properly pushed or tightened. Replace damaged tubing if leaks persist. It’s also helpful to check connections after a few hours of use, as slight shifts can sometimes cause small leaks to appear.
Low Water Pressure
Check for kinks in tubing or clogged filters. Reverse osmosis systems may require pressure reduction; consider a booster pump if needed. Regularly replacing filters can also help maintain consistent water flow and prevent pressure drops over time.
No Water Flow
Confirm the shutoff valve is fully open. Check if the tubing is connected to the correct ports and not blocked. Additionally, ensure that any protective caps or plugs inside the system are removed before installation.
Difficulty Drilling Faucet Hole
Use a drill bit suitable for your sink material (e.g., a diamond bit for granite). If unsure, hire a professional. Applying steady pressure and using water to cool the drill bit can also help prevent surface cracking or damage.
Filter Taste or Odor Issues
Flush new filters thoroughly before use. Replace filters if water quality does not improve. If unusual tastes persist, inspect the system for improper installation or contamination in the water source.
Benefits of Having a Water Filtration System for Health and Taste
Installing a water filtration system offers several advantages:
Improved Health
Filters reduce contaminants such as chlorine, lead, pesticides, and bacteria, lowering health risks associated with these substances.
Better Taste and Odor
Removing chlorine and organic compounds enhances water flavor, making it more enjoyable to drink and cook with.
Cost Savings
Filtered tap water reduces reliance on bottled water, saving money and reducing plastic waste.
Convenience
Having clean, on-demand water at home eliminates the need to carry or store bottled water.
Protects Appliances
Filtering out sediment and minerals can extend the life of coffee makers, kettles, and other appliances.
Choosing and installing the right system ensures you and your family have access to safe, great-tasting water every day.
For reliable installation and home improvement services, choose us at The Handyman San Diego. Our experienced team handles water filtration system installations with precision and offers a wide range of services, including drywall repair, interior and exterior painting, and home exterior maintenance. We focus on quality workmanship and customer satisfaction, providing convenient, all-in-one solutions to keep your home in excellent condition.
Conclusion
Installing a water filtration system is a practical investment that improves the safety, taste, and overall quality of your household water. With the right system and proper installation, you can enjoy cleaner, healthier water while protecting your appliances and reducing reliance on bottled alternatives. If you prefer a hassle-free experience, The Handyman San Diego is here to help with expert installation and a wide range of home improvement services.
Contact us today to schedule your professional water filtration system installation and ensure your home has access to safe, great-tasting water.
FAQs
1. How long does it take to install a water filtration system?
Most under-sink systems can be installed in 1–3 hours, depending on complexity and whether a new faucet is required.
2. How often should I replace the filters?
Filter replacement typically ranges from every 6 to 12 months, but this can vary based on the type of system and your water usage.
3. Can I install a water filtration system myself?
Yes, many systems are DIY-friendly, but professional installation ensures proper setup, prevents leaks, and saves time.
4. What type of water filtration system is best for my home?
The best system depends on your water quality and needs—reverse osmosis is ideal for thorough purification, while carbon filters are great for improving taste and odor.


Comments